Thursday, July 26, 2018

Afternoon snack

I love a good snack. Big bonus points if it's a healthy snack that tastes good and uses up random stuff in the fridge.

While the baby sleeps away a fever, I made a winning snack: a hummus, fresh basil and kale sandwich on toasted bread. Fab!


Other quick snack ideas I love:

  • Chips and salsa
  • Avocado toast
  • Simple spinach salad
  • Pistachios
  • Granola with almond milk
  • Leftover noodles with olive oil and vegan parmesan
  • Crackers with Toffuti cream cheese
  • Crackers with chocolate hazelnut spread, I love the Justin's brand.
  • Smoothie, Current family fave is Strawberries, blueberries, avocado and kale.


Share your favorite simple afternoon snacks!

Saturday, July 21, 2018

Non-toxic weed killers

I don't mind weeds in the lawn and while he tolerates my love for some weeds, my husband favors the classic American sea of green. We compromise. All weeds are welcome in the back yard. Clover, wild violets and a few others are acceptable in the front. In fact, I plant clover readily around my entire yard for two reasons... it's a great nitrogen source as fertilizer for the grass growing around it. And two, it's a source of nectar for bees! (More on this in a future post.)

I love the look of clover in the lawn, the bees love it too. Plus it's a natural fertilizer!
Dandelions, oxalis, sorrel and a host of others are less welcome. I have to admit, getting dandelion stems stuck between our toes while walking through the grass isn't all that pleasant. We've finally found a solution that doesn't make me cringe with the thought of us walking barefoot through the lawn. Iron.

Liquid iron is sold at some online garden stores. I bought Iron-X for around $35 that makes 3 gallons in a pump sprayer. I gave it a good try and I'm kinda thrilled. I tested it on a variety of weeks in my yard. Dandelions, creeping Charlie, some oxalis, spurge, prostate surge, black medic and many others were dead within the day.

In a pump sprayer I mixed the iron with water according to the package directions. If ingested, Iron is dangerous. Spray it on and the weeds turn black as they shrivel. Grass may darken a bit but that recovers quickly and the grass is left unharmed. It's a miracle!

Black Medic after iron application

Wood sorrel after iron application

Dandelion after iron application

Creeping Charlie after iron application

But nothing is perfect. The iron does not kill grassy weeds like crab grass. I'm still on the hunt there. It has trouble with  oxalis in some areas. For now I'm pulling those by hand or leaving them. It's a daunting task that I tackle a little at a time.

Prostrate Spurge after iron application


For weeds in the cracks of the driveway and sidewalk or rocks things get interesting. Some say iron can stain your concrete or stone. I haven't found that to be the case in my small test areas. But because iron is a bit expensive I like another option for sidewalk and driveway cracks anyway!

That's where the weed torch comes into play! Keeping safety top of mind this torch is excellent for removing weeds. And in my experience they stay away for some time!

Because the torch scorches everything in range, the weeds and their seeds are destroyed.

Of course there are exceptions to the rule. Unfortunately grasses and dandelions tend to come back and new weed seeds eventually make their way back in. Others though are goners. I'll take that.

Vinegar with epsom salt and dish soap is another popular option but I've found the results don't last as long. Plus vinegar has it's own clash with the environment. It's very toxic to amphibians, for example. (I have a lot of tree frogs that show up.)

Anyone else have a non-toxic weed solution to share?


Note: At time of this post I have no affiliation or sponsorship from any products mentioned.


Friday, May 20, 2016

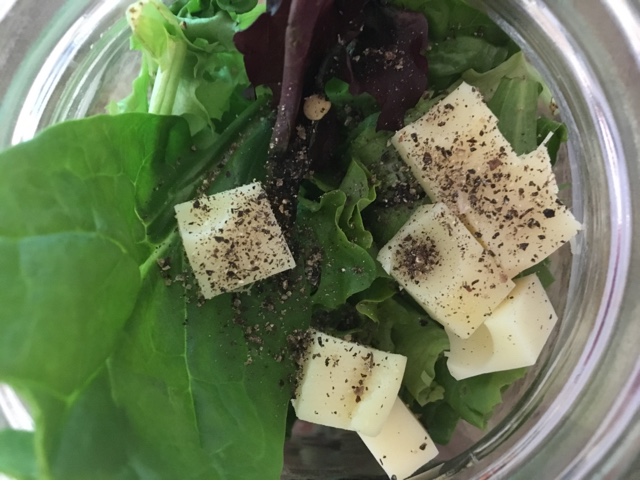
Salad club: ranch peppercorn salad

There's nothing overly special about any of this week's ingredients. But the salad is colorful and it just tastes good! 


In the jar from bottom to top:
Peppercorn ranch dressing
Avocado
Carrots
Sweet peppers
Dry salami
Mixed greens
Swiss cheese
Fresh cracked pepper

Enjoy! 


Saturday, May 14, 2016

Garlic mustard pesto.

You can see it growing alongside pretty much any given roadway right now. It's called garlic mustard. A knee to thigh high plant with tiny white flowers at its top. You might even have some growing in your yard or garden. Pull it out!


While it is pretty, the problem is that it's invasive. Just one garlic mustard plant produces hundreds of seeds. And it's taking over!

The good news is that it comes out easily and you can eat it!


Here's a recipe I came up with along with some inspiration from Chef Marianne Miller of the Saga Hill Cooking School.

Garlic mustard pesto:
  • Lots of garlic mustard leaves, removed from stem (Not the flowers)
  • 1/4 cup sunflower seeds
  • 2 Tbsp apple cider vinegar
  • 1 clove garlic
  • 1/4 tsp cayenne pepper
  • 1tsp salt
  • 1tsp freshly ground pepper
  • 1/4 to 1/2 cup extra virgin olive oil


Thoroughly wash and dry the garlic mustard leaves. (Be sure the plants you pick for eating have not been sprayed with pesticides.) the leaves remove easily and similar to de-stemming kale or chard. Lightly grasp the top of the stem just beneath the flower. Run your fingers down the stem to remove the leaves. 


Add the leaves and the rest of the ingredients to a food processor. Before mixing, the food processor should be filled with leaves to the max fill line. Pulse until mixture is smooth but not uniform. You can't go wrong here so feel free to not measure. Add more olive oil if you would like the pesto thinner, leave some out if you'd like it to have a thicker consistency. Taste and adjust seasonings as necessary.


That's it! It's done! You can serve it just like you would a basil pesto. Spread it on grilled bread. Serve with pasta and parmesan cheese. Swirl it into your favorite hummus.


And get crazy with the ingredients too. Add some grated parmesan or sun dried tomatoes. Throw in some lime and cumin. Switch out the sunflower seeds for pumpkin seeds or pine nuts. The list is endless. Have fun and enjoy!


And side note: Help spread the word about this invasive plant that needs to be pulled out! 

Friday, May 13, 2016

Spaghetti Pie, my first attempt

Let me start out by saying I'm so not a recipe follower. I like to throw things together and hope for the best. This time it worked! 


I've never made spaghetti pie but I saw it on Facebook from the Today show and it looked design so what the heck... Let's try it.

My so-called recipe for spaghetti pie:
3/4 pound spaghetti noodles, cooked al dente and drained well
2 large or 3 smaller eggs, whisked
3/4 jar marinara sauce
1/4 cup grated Parmesan 
4 oz. whipped cream cheese
1 can mushrooms, sliced
Italian seasoning
1/2 large onion, diced
1 pound pork sausage
4 to 6 oz. shredded mozzarella or Monterey Jack cheese
Sprinkle of Italian seasoning

Preheat oven to 400 and cook noodles according to pal age directions.

Brown onion and sausage in a pan until cooked through and browned. Meanwhile in a LARGE bowl add eggs, marinara, Parmesan, cream cheese and mushrooms. Stir to combine, breaking up any large chunks of cream cheese. Drain excess fat from sausage and onion mixture and add to bowl. Stir to combine. Add noodles and toss to combine.

Pour or spoon mixture into a greased springform pan. Top with shredded cheese and herbs.

Bake for 30 minutes until cheese is browned. Remove from oven and let sit 5 to 10 minutes. Remove the pie from the pan, cut and serve! Some extra marinara might be a good idea to have on the plate. 


Enjoy!


Kare salad club: Sweet and savory

I LOVE my salad club more than almost anything else in my work day. Here's how it works:

There are six members of salad club. We each have a day assigned to us. My day is Thursday. Every Thursday I being six mason jar salads, one for each member. Every other weekday I don't have to bring anything but there's a salad waiting for me in the fridge! So I get lunch everyday but I only have to think about it once a week. Genius!


And because there are six members and only five weekdays we rotate a bye week. Another genius move.

We've been a club for several months now and I have yet to eat a salad I didn't like. And we've yet to have any problems with logistics.

I seriously encourage you to start up a salad club at your work!

My tactic for deciding what to make is jaunt to stroll grouch the market and see what looks good. This is what caught my eye this week:

Sweet and savory salad:
Poppyseed dressing
Blueberries
Fresh sweet corn, cut from the cob but left raw
Cantaloupe, cut into bite sized pieces
Goji berries
Garlic and herb goat cheese
Cashews
Mixed greens
Pea shoots (that I grew myself! 👏🏻)


Enjoy!

Monday, May 9, 2016

Kitchen sink pasta salad

I love sweets and creamy, full fat food, don't get me wrong. I want caramel rolls and creme brûlée on the table just as much as the next girl. But in my family I'm also usually the one pushing to have at least one healthy dish on the table. Bonus points if it's a vegetable! 

So when grilling out for Mother's Day meant brats and potato salad and my mom's signature dish, beans Janeen, I ipted for add a pasta salad loaded with veggies to the table. 


My style of cooking involves a process that goes something like this: What do I have in the fridge? What do I have in the pantry? Okay let's make something out of that. Here's what I ended up with:

Kitchen Sink Pasta Salad
1 pound pasta, cooked and rinsed
5 carrots, shredded
1 medium zucchini, shredded
1 red onion, diced
1 yellow pepper, diced
Handful of green olives, chopped
1 can black beans, drained and rinsed
20-30 pepperoni slices, chopped
1 bottle ceaser vinaigrette

Plop it all in a bowl and let sit for at least 30 minutes. Serve and enjoy!


Easy peasy, healthy and very yummy! 

Friday, September 26, 2014

Hidden Veggies: Kale Muffins


I love eating things that are both healthy and tasty and I think this combo that comes together as kale muffins fits that description to a T! It started out as an experimental recipe, adapted from a spinach muffin recipe I had made before. As I"m typing they are out of the oven, and a couple are in my belly.

It's September and there is still a lot of kale in my garden. I do like to freeze some to add to soups throughout the winter, but I have a lot. For some reason my mom and I are really good at growing kale. Peppers never turn out so well for us, but we can raise kale with the best of them. This year we had both curly and dinosaur kale in the garden. For this recipe I used curly but I'd swap out any variety any day and bet it wouldn't make much difference.

The muffins turned out just how I like them. A little sweet, with a hint of banana. I recall teh spinach ones being a little brighter green, but the slightly more dull color doesn't bother me. If you're looking to "trick" kids into eating a green muffin, I might go with the spinach instead. Swap it out, tit for tat, no problem.

Here's how I made them...


Ingredients:
6-7 cups fresh kale leaves, washed and roughly chopped with stems removed
1 cup almond milk
1/4 cup coconut oil, melted just enough to be a liquid.
2 ripe bananas
2 tsp vanilla extract
1 cup quinoa, cooked and cooled
2 cups whole wheat flour
3/4 cup sugar
1 tsp baking soda
2 tsp baking powder
1 tsp ground cinnamon
1/2 tsp salt
3/4 cup slivered or chopped almonds, walnuts or pecans (optional)

Preheat oven to 350°.

Using a stick blender in a large bowl, puree kale with milk and oil. (This part starts off slow but picks up speed as more kale turns to liquid. Regular milk is just fine if you don't have almond milk.) Add bananas and vanilla and continue blending to combine. Add quinoa, stir to combine and set aside.


Combine next six ingredients in a separate bowl and whisk or stir to combine. Add dry mixture to the kale mixture and stir until just combined. (If batter is very thick and dry, add an additional splash of milk.) Add nuts and stir gently to combine.


Drop 1/4 cup batter into greased muffin tin. Bake for 18-20 minutes until a toothpick comes out clean. Expect about 20 muffins.

Enjoy and let me know what you think!

Tuesday, July 22, 2014

Dinner straight from the garden.

To me one of the best things in life is eating a meal made from food homegrown in my own garden. My mom and I did just that with this simple and super healthy pasta.

Like a lot of the things I make, the so called recipe for this meal is very flexible. Add what you have from your garden or farmers market or grocery store. You can't screw it up! Try to eat the rainbow!

Here's what we came up with:
Candy stripe beets and their greens
Yellow squash
Kale
Cherry tomatoes
Yellow onion
Frozen peas
Chives
Basil
Oregano

Other than the peas, tomatoes and onion, we picked all the veggies and herbs from the garden just before eating them. Perfect!

We sautéed them in some olive oil with just salt and pepper before tossing them with pasta and a couple pads of butter. Done. Voila! Super yummy.

Ingredients:
1/2 large yellow squash, or one small one
3 small beets (peeled) and their greens
1/2 large onion
6 large kale leaves
A dozen or so cherry tomatoes, halved
1/2 cup frozen peas
Small handful of chives
Couple sprigs of each basil and oregano
1/2 pound dried pasta
2-3 Tbsp butter
2-3 Tbsp olive oil

Prepare pasta according to package directions and save some of the cooking water before you drain. Meanwhile, chop all veggies into bite size chunks. Chop up the herbs as well. Then heat a big drizzle of olive oil in a sautée pan. Add veggies from hardest to most tender. For me the beets and onions went in first. Then the squash and greens. Salt and pepper to taste. After a minute or two we turned off the heat and threw in the tomatoes, peas and herbs. Add the veggies to drained pasta with the butter and another small gulf of olive oil. Add 1/4 cup of the cooking liquid or so to make a very light sauce. Salt and pepper to taste. Enjoy!

Friday, July 11, 2014

Baby bump!

Some people have (daringly) asked if I had a baby bump these days. Well it is true! My husband, Bryan, and I are so excited to let everyone know that we are expecting our first little one in January. The due date is January 9th to be exact so that puts me at 14 weeks today.

Answers to the obvious questions...
Yes we are planning on finding out the gender.
And yes we have a couple names picked out for either a boy or a girl but we aren't telling those! 

Mmmm. Double chocolate banana peanut butter muffins

So I woke up this morning to the sound of thunderstorms. A very welcome sound since they were in the forecast! The baby and I decided we were going to make muffins for breakfast. A quick scan of Pinterest gave us these:
http://www.averiecooks.com/2014/05/flourless-double-chocolate-peanut-butter-mini-blender-muffins.html

We used a kitchen aid mixer with the whisk attachment instead of a blender but otherwise followed the recipe just like it says. And oh yummy are they good!! They came out of the oven about 10 minutes ago and I've eaten 4 already.


My batch made 23 total mini muffins. I predict the remaining 19 won't make it through the weekend. Maybe not even through tomorrow!

P.S. I guess the my energy really is coming back now that it's the second trimester. Even just a couple weeks ago I never could have imagined scraping up enough energy to cook or bake anything! This is very good news!

Tuesday, April 29, 2014

Pasta alla Belinda

The inspiration for dinner last night began when Bel came into the office with a bag of beet greens. She had used the beets but brought the greens to me because she knows me well enough to know I'd make good use of them.  I've never cooked with beet greens before, but here's what I came up with...

It was an all day rain... gloomy for days. So a good belly-filling pasta made sense to me. This is how pasta alla Belinda was born.

First, the sauce. It's an artichoke and dry salami red sauce. Made from scratch but almost as easy as dumping in a jar of marinara.

In a heavy sauce pan heat 1 Tbsp of olive oil. Add chopped salami, onion and garlic along with crushed red pepper, dried Italian herbs and salt and pepper to taste. Saute until onions are translucent and salami is starting to brown a bit. Add 2-3 Tbsp tomato paste and incorporate.

Add 1 quart tomato puree and chopped artichokes and stir to combine. Simmer 10-20 minutes to your desired thickness. If you want it even thicker, just add more tomato paste.

Next, the noodles and greens.

Preparing the greens just involves a very rough chop and lots of rinsing. You don't want dirty grit in your pasta! Also make sure to pick out any slimy greens or any that have begun to brown.

Because I can't tell the difference I always use whole wheat noodles. My husband doesn't notice the difference either and he is definitely not a whole wheat kind of guy. These noodles have really been improved over the last couple years. Good news there!

Anyway, prepare the noodles according to package instructions, making sure to add salt to taste. I chose thin spaghetti, but feel free to use any type of noodle you have on hand.

Then during the last 3-4 minutes of cooking time, add your washed and chopped beet greens.

Strain them together in a colander when the noodles are done al dente.

Lastly, plate it up!

  
Top noodles with sauce and grate some fresh Parmesan on top if you wish. Serve with some crusty bread and a glass of red wine and you're good to go!  This dinner takes about 30 minutes start to finish.


Sauce:
1 Tbsp olive oil
2 cups chopped dry salami
1 small onion, diced
2 cloves garlic, minced
2 tsp crushed red pepper, more or less to taste
1 tsp dried Italian herb blend
salt
pepper
2-3 Tbsp tomato paste
1 jar artichokes, chopped
1 quart pureed tomatoes ( diced tomatoes in juice will also work just fine.)

Heat oil in saucepan. Add next seven ingredients and saute until lightly browned. Add tomato paste and combine. Add artichokes and puree. Simmer 10-20 minutes to desired consistency.

Pasta and greens:
1lb whole wheat pasta
2 bunches beet greens, chopped and thoroughly washed.

Cook pasta according to package instructions. Add greens during the final 3-4 minutes of cook time. Strain. Top with sauce and serve.


Monday, April 14, 2014

Magical Muffins.

I got a new oven, so naturally I needed to bake something. Scraping together what I had in my nearly empty refrigerator and paring that with a few different posts on Pinterest I whipped up two different versions. Both super healthy and super yummy!

Version 1: Carrot and quinoa muffins with wanuts.

Ingredients:
1 cup cooked quinoa, cooled
3/4 cup brown sugar
1/2 coconut oil
1/2 cup plain yogurt
1 teaspoon vanilla extract
2 eggs
2 carrots, shredded
1/2 cup chopped walnuts
1 1/2 cups whole wheat flour
1 teaspoon baking soda
1/2 teaspoon salt

Combine first eight ingredients in a stand mixer and beat just until incorporated. It help to slightly warm the coconut oil so you don't get chunks, but if you're lazy like me and don't want to dirty yet another dish, just turn the mixer on high for 15 seconds or so and that should do the trick.

I know with baking you're supposed to be as accurate as possible with measuring, but that's just not my style. I loosely measured and the muffins turned out great, so have no fear.  Throw them together and they should be fine.

Combine the last three ingredients in a separate bowl and give them a quick mix before adding them to the wet mixture. Do not overmix. Just get everything together.

Divide batter into a lightly sprayed, 12 cup, muffin tin and bak at 350° until a toothpick just comes out clean. This should be about 18 minutes or so. Let them cool a couple minutes in the tin before transferring to a cooling rack. Enjoy or store in a plastic container!

Review: I could taste the quinoa in this recipe so if you're not a fan, move on to version 2. But I was a big fan of these and snacked on them through the week without feeling one ounce of guilt. I feel like they were a good make up snack since I ate lunch at Culver's twice last week.  Love Culver's! In fact, that was my first job. #Memories.

Version 2: Coconut, banana, walnut muffins with quinoa and summer squash (long name, I know)

Ingredients:
1 cup cooked quinoa, cooled
3/4 cup brown sugar
1/2 coconut oil
1/2 cup plain yogurt
1 teaspoon vanilla extract
1 very ripe banana
1 small summer squash, shredded
1/2 cup chopped walnuts
1/2 cup shredded coconut
1 1/2 cups whole wheat flour
1 teaspoon baking soda
2 teaspoons baking powder
1/2 teaspoon salt

I ran out of eggs so the banana and baking powder takes their place. The summer squash I had was in the freezer from last summer's crop. I actually had it cut into 1 inch pieces so I threw it in the food processor for a couple pulses to "shred" it up but it more or less turned out as a chucky puree. No prob.  Whatever you have is fine. Substitute zucchini here if that's what you have.

So, the directions are VERY similar to version one.

Combine first nine ingredients in a stand mixer and beat just until incorporated. It help to slightly warm the coconut oil so you don't get chunks, but if you're lazy like me and don't want to dirty yet another dish, just turn the mixer on high for 15 seconds or so and that should do the trick.

Combine the last four ingredients in a separate bowl and give them a quick mix before adding them to the wet mixture. Do not overmix. Just get everything together. here's a plus with this recipe: no eggs means the batter is free game. I LOVE MUFFIN BATTER! (I actually fully taste it with the eggs in too.)

Divide batter into a lightly sprayed, 12 cup, muffin tin and bak at 350° until a toothpick just comes out clean. This should be about 18 minutes or so. Let them cool a couple minutes in the tin before transferring to a cooling rack. Enjoy or store in a plastic container!

Review: These turned out a lttle flat on top, but their flavor was ah-mazing. This is the perfect version for those of you trying to hide healthy things in yummy tasting food. You cannot taste the quinoa or squash here. The coconut, banana and walnuts completely take over. I'm a fan.

Try them out and let me know what you think! Try substituting some of what you have in the pantry and give it a try. If it turns out, great! If not, oh well. Learning lesson.

PS, loving the new oven.